
Our TASCAM / IDC to XLR / TRS IN & OUT PCB & STEREO IO PCB can be used with this pcb as well.
TASCAM / IDC to XLR / TRS IN & OUT PCB here
STEREO IO PCB here
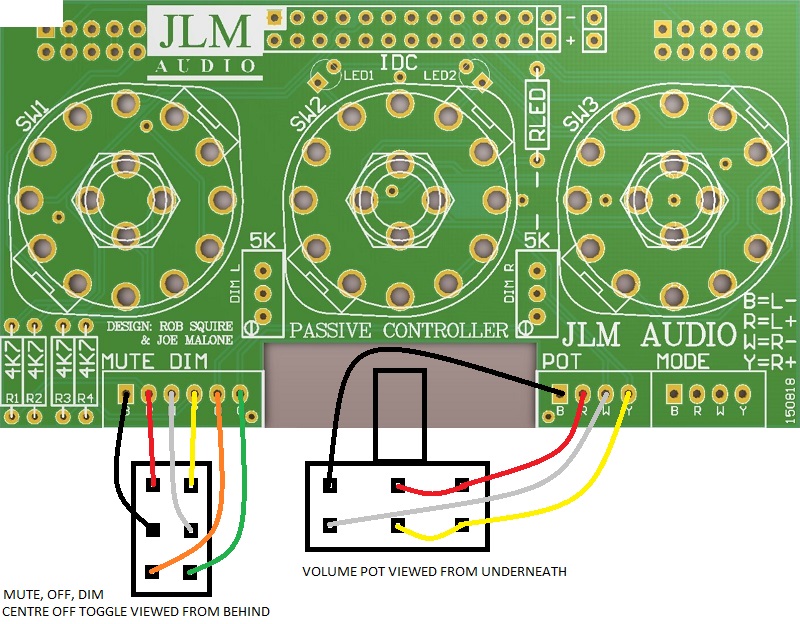
Passive Controller Wiring Ver 2 & 3
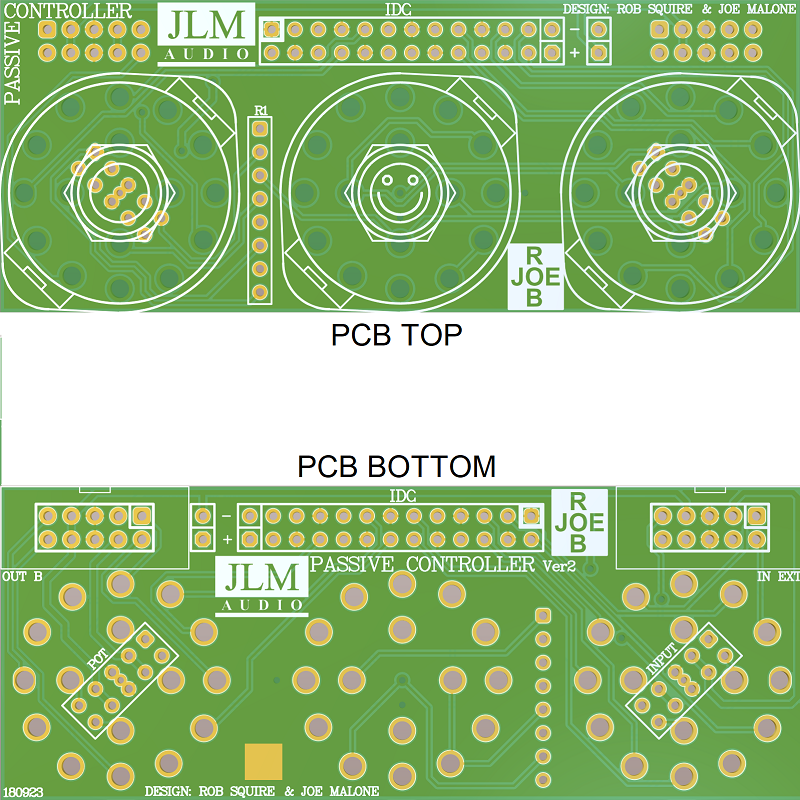
Passive Monitor Controller PCB ver 2 & 3 size is 86.9mm (3.42") x 36.9mm (1.34")
3 switches are spaced 30.48mm (1.2") appart centre to centre of the switch next to it.
See wiring diagram attachment at the bottom of this post.
Note 1. Square Pin 1 of 26 pin IDC cable header is pin 25 on DB25 connector.
Note 2. On this PCB mode control layout is MONO, STEREO, REV.
Note 3. All 10 pin connectors on ver 2 & 3 pcb follow the JLM STBUS pinout.
Note 4. Do not push rotary switches fully down to the pcb as they will short on pot and input solder joints under them.
STBUS = Pin 1 L+, pin 2 L-, pin 3&4 +V, pin 5&6 0v, pin 7&8 -V, pin 9 R-, pin 10 R+.
R1 is SIL of 4 x 4k7 or 4 x 4k7 1/4 resistors standing side by side.
Passive Controller Wiring Ver 1
3 switches are spaced 30.48mm (1.2") appart centre to centre of the switch next to it.
Note 1. Square Pin 1 of 26 pin IDC cable header is pin 25 on DB25 connector.
note 2. On this PCB mode control layout is MONO, STEREO, REV.
Link to Rob Squires original article on making the passive controller below.
http://www.jlmaudio.com/Reviews/AT78_OTB.pdf


